9. Working with Time Series
Here, automate steps 2-5, 7-8 from above to get data for the entire month of July for visualization and statistical analysis of the progression of drought conditions in Europe.
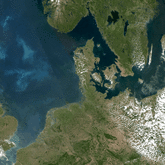
You will need to download the VNP09GA data product for tile h18v03 for the month of July 2018 to complete Section 9. There are multiple options for downloading these files, including via a text file containing links to each of the files on the LP DAAC Data Pool, or through NASA Earthdata Search using the query provided in the link. Make sure that you download the files into the inDir directory defined above to complete this section.
The cell below will find all the .h5 files in that directory, create a list of all the file names, and print the results.
fileList = [file for file in os.listdir() if file.endswith('.h5') and file.startswith('VNP09GA')] # Search for .h5 files in current directory
for f in fileList: print(f)
VNP09GA.A2018182.h18v03.001.2018183084726.h5
VNP09GA.A2018183.h18v03.001.2018184074906.h5
VNP09GA.A2018184.h18v03.001.2018185074620.h5
VNP09GA.A2018185.h18v03.001.2018186075154.h5
VNP09GA.A2018186.h18v03.001.2018187181948.h5
VNP09GA.A2018187.h18v03.001.2018190194607.h5
VNP09GA.A2018188.h18v03.001.2018190220857.h5
VNP09GA.A2018189.h18v03.001.2018190213502.h5
VNP09GA.A2018190.h18v03.001.2018191075356.h5
VNP09GA.A2018191.h18v03.001.2018192075252.h5
VNP09GA.A2018192.h18v03.001.2018193085141.h5
VNP09GA.A2018193.h18v03.001.2018194083824.h5
VNP09GA.A2018194.h18v03.001.2018195081724.h5
VNP09GA.A2018195.h18v03.001.2018196075344.h5
VNP09GA.A2018196.h18v03.001.2018197081921.h5
VNP09GA.A2018197.h18v03.001.2018199192103.h5
VNP09GA.A2018198.h18v03.001.2018222183129.h5
VNP09GA.A2018199.h18v03.001.2018200091624.h5
VNP09GA.A2018200.h18v03.001.2018201080455.h5
VNP09GA.A2018201.h18v03.001.2018202072301.h5
VNP09GA.A2018202.h18v03.001.2018203073754.h5
VNP09GA.A2018203.h18v03.001.2018204141303.h5
VNP09GA.A2018204.h18v03.001.2018205083730.h5
VNP09GA.A2018205.h18v03.001.2018206080321.h5
VNP09GA.A2018206.h18v03.001.2018207164400.h5
VNP09GA.A2018207.h18v03.001.2018208073329.h5
VNP09GA.A2018208.h18v03.001.2018209083918.h5
VNP09GA.A2018209.h18v03.001.2018210082556.h5
VNP09GA.A2018210.h18v03.001.2018211084421.h5
VNP09GA.A2018211.h18v03.001.2018214203714.h5
VNP09GA.A2018212.h18v03.001.2018214223310.h5
date = [] # Create empty list to store dates of each file
i = 0     # Set up iterator for automation in cell block below
9a. Automation of Steps 2-5, 7-8
This section provides steps to loop through each daily VNP09GA file from July 2018 and import the data, scale the data, apply a land/water mask and filter by quality, calculate VIs, georeference, and export as GeoTIFFs.
Ultimately, near the end of the code block below, append each file into a 3D array containing all NDVI observations for July 2018.
for t in fileList:
    yeardoy = t.split('.')[1][1:]                                                                  # Split name,retrieve ob date
    outName = t.rsplit('.', 1)[0]                                                                  # Keep filename for outname
    date1 = dt.datetime.strptime(yeardoy,'%Y%j').strftime('%m/%d/%Y')                              # Convert date
    date.append(date1)                                                                             # Append to list of dates
    f = h5py.File(os.path.normpath(t),"r")                                                             # Read in VIIRS HDF-EOS5 file
    h5_objs = []                                                                                   # Create empty list
    f.visit(h5_objs.append)                                                                        # Retrieve obj append to list
    fileMetadata = f['HDFEOS INFORMATION']['StructMetadata.0'][()].split()                         # Read file metadata
    fileMetadata = [m.decode('utf-8') for m in fileMetadata]                                       # Clean up file metadata
    allSDS = [o for grid in grids for o in h5_objs if isinstance(f[o],h5py.Dataset) and grid in o] # Create list of SDS in file
    r = f[[a for a in allSDS if 'M5' in a][0]]                                                     # Open SDS M5 = Red
    g = f[[a for a in allSDS if 'M4' in a][0]]                                                     # Open SDS M4 = Green
    b = f[[a for a in allSDS if 'M3' in a][0]]                                                     # Open SDS M3 = Blue
    n = f[[a for a in allSDS if 'M7' in a][0]]                                                     # Open SDS M7  = NIR
    red = r[()] * scaleFactor                                                                      # Apply scale factor
    green = g[()] * scaleFactor                                                                    # Apply scale factor
    blue = b[()] * scaleFactor                                                                     # Apply scale factor
    nir = n[()] * scaleFactor                                                                      # Apply scale factor
    rgb = np.dstack((red,green,blue))                                                              # Create RGB array
    rgb[rgb == fillValue * scaleFactor] = 0                                                        # Set fill value equal to nan
    qf = f[[a for a in allSDS if 'QF5' in a][0]][()]                                               # Import QF5 SDS
    red = np.ma.MaskedArray(red, np.in1d(qf, goodQF, invert = True))                               # Apply QF mask to red data
    green = np.ma.MaskedArray(green, np.in1d(qf, goodQF, invert = True))                           # Apply QF mask to green data
    blue = np.ma.MaskedArray(blue, np.in1d(qf, goodQF, invert = True))                             # Apply QF mask to blue data
    nir = np.ma.MaskedArray(nir, np.in1d(qf, goodQF, invert = True))                               # Apply QF mask to NIR data
    qf2 = f[[a for a in allSDS if 'QF2' in a][0]][()]                                              # Import QF2 SDS                                                                  # Append to list
    red = np.ma.MaskedArray(red, np.in1d(qf2, land, invert = True))                                # Apply QF mask to red data
    green = np.ma.MaskedArray(green, np.in1d(qf2, land, invert = True))                            # Apply QF mask to green data
    blue = np.ma.MaskedArray(blue, np.in1d(qf2, land, invert = True))                              # Apply QF mask to blue data
    nir = np.ma.MaskedArray(nir, np.in1d(qf2, land, invert = True))                                # Apply QF mask to NIR data
    ndvi = ndviCalc(red, nir)                                                                      # Calculate NDVI
    evi = eviCalc(red, nir, blue)                                                                  # Calculate EVI
    ndvi[np.where(np.logical_or(ndvi < 0, ndvi > 1)) ] = np.nan                                    # Set fill value equal to nan
    evi[np.where(np.logical_or(evi < 0, evi > 1)) ] = np.nan                                     # Set fill value equal to nan
    p2, p98 = np.percentile(rgb, (2, 98))                                                          # Calc val at 2nd/98th %
    rgbStretched = exposure.rescale_intensity(rgb, in_range=(p2, p98))                             # Contrast stretch RGB range
    rgbStretched = exposure.adjust_gamma(rgbStretched, 0.5)                                        # Perform Gamma Correction
    fig = plt.figure(figsize =(10,10))                                                             # Set the figure size
    ax = plt.Axes(fig,[0,0,1,1])
    ax.set_axis_off()                                                                              # Turn off axes
    fig.add_axes(ax)
    ax.imshow(rgbStretched, interpolation='bilinear', alpha=0.9)                                   # Plot a natural color RGB
    fig.savefig('{}{}_RGB.png'.format(outDir, outName))                                            # Export  RGB as png
    plt.close(fig)
    params = {'red':{'data':red, 'band': 'M5'}, 'green':{'data':green, 'band': 'M4'},              # Create dict for each layer
              'blue':{'data':blue, 'band': 'M3',}, 'ndvi':{'data':ndvi, 'band': 'NDVI'},
              'evi':{'data':evi, 'band': 'EVI'}, 'qf':{'data':qf, 'band': 'QF'},
              'qf2':{'data':qf2, 'band': 'QF2'}, 'rgb':{'data':rgb, 'band': 'RGB'}}
    for p in params:
        try:
            data = params[p]['data']                                                               # Define array to be exported
            data[data.mask == True] = fillValue                                                    # Masked values = fill value
        except: AttributeError
        outputName = os.path.normpath('{}{}_{}.tif'.format(outDir, outName, params[p]['band']))    # Generate output filename
        nRow, nCol = data.shape[0], data.shape[1]                                                  # Define row/col from array
        dataType = gdal_array.NumericTypeCodeToGDALTypeCode(data.dtype)                            # Define output data type
        driver = gdal.GetDriverByName('GTiff')                                                     # Select GDAL GeoTIFF driver
        if p == 'rgb':                                                                             # Diff for exporting RGBs
            data = params[p]['data']                                                               # Define the array to export
            dataType = gdal_array.NumericTypeCodeToGDALTypeCode(data.dtype)                        # Define output data type
            options = ['PHOTOMETRIC=RGB', 'PROFILE=GeoTIFF']                                       # Set options to RGB TIFF
            outFile = driver.Create(outputName, nCol, nRow, 3, dataType, options=options)          # Specify parameters of GTIFF
            for b in range(data.shape[2]):                                                         # loop through each band (3)
                outFile.GetRasterBand(b+1).WriteArray(rgb[:,:,b])                                  # Write to output bands 1-3
                outFile.GetRasterBand(b+1).SetNoDataValue(0)                                       # Set fill val for each band
            outFile.GetRasterBand(1).SetColorInterpretation(gdal.GCI_RedBand)                      # Define red band
            outFile.GetRasterBand(2).SetColorInterpretation(gdal.GCI_GreenBand)                    # Define green band
            outFile.GetRasterBand(3).SetColorInterpretation(gdal.GCI_BlueBand)                     # Define blue band
        else:
            outFile = driver.Create(outputName, nCol, nRow, 1, dataType)                           # Specify parameters of GTIFF
            band = outFile.GetRasterBand(1)                                                        # Get band 1
            band.WriteArray(data)                                                                  # Write data array to band 1
            band.FlushCache                                                                        # Export data
            band.SetNoDataValue(float(fillValue))                                                  # Set fill value
        outFile.SetGeoTransform(geoInfo)                                                           # Set Geotransform
        outFile.SetProjection(prj)                                                                 # Set projection
        outFile = None                                                                             # Close file
    if i == 0:                                                                                     # Set up 3d raster stack
        ndviTS = ndvi[np.newaxis,:,:]                                                              # Add 3rd axis for stacking
    else:
        ndvi  = ndvi[np.newaxis,:,:]                                                               # Add a third axis
        ndviTS = np.ma.append(ndviTS,ndvi, axis=0)                                                 # Append to 'master' 3d array
    print('Processed file: {} of {}'.format(i+1,len(fileList)))                                    # Print the progress
    i += 1                                                                                         # increase iterator by one
Processed file: 1 of 31
Processed file: 2 of 31
Processed file: 3 of 31
Processed file: 4 of 31
Processed file: 5 of 31
Processed file: 6 of 31
Processed file: 7 of 31
Processed file: 8 of 31
Processed file: 9 of 31
Processed file: 10 of 31
Processed file: 11 of 31
Processed file: 12 of 31
Processed file: 13 of 31
Processed file: 14 of 31
Processed file: 15 of 31
Processed file: 16 of 31
Processed file: 17 of 31
Processed file: 18 of 31
Processed file: 19 of 31
Processed file: 20 of 31
Processed file: 21 of 31
Processed file: 22 of 31
Processed file: 23 of 31
Processed file: 24 of 31
Processed file: 25 of 31
Processed file: 26 of 31
Processed file: 27 of 31
Processed file: 28 of 31
Processed file: 29 of 31
Processed file: 30 of 31
Processed file: 31 of 31
Notice above that the for loop also stacked the monthly observations into a three-dimensional array that we will use to generate time series visualizations in the final section.
ndviTS = np.ma.MaskedArray(ndviTS, np.in1d(ndviTS, fillValue, invert = False)) # Mask fill values in NDVI time series (3d array)
9b. Time Series Analysis
This section provides steps for how to calculate basic statistics on the NDVI time series created above, export the results to a .csv file, and visualize the mean and standard deviation of NDVI over Central Europe to gain a better understanding of the progression of drought in the region.
First set a pandas dataframe to store the statistics.
# Create dataframe with column names
stats_df = pd.DataFrame(columns=['File Name', 'Dataset', 'Date', 'Count', 'Minimum', 'Maximum', 'Range','Mean','Median',
                        'Upper Quartile', 'Lower Quartile', 'Upper 1.5 IQR', 'Lower 1.5 IQR', 'Standard Deviation', 'Variance'])
Statistics: The statistics calculated below include box plot statistics, such as the total number of values/pixels (n), the median, and the interquartile range (IQR) of the sample data for values within a feature from a selected date/layer. Also calculated are the `Lower 1.5 IQR`, which represent the lowest datum still within 1.5 IQR of the lower quartile, and the `Upper 1.5 IQR`, which represent the highest datum still within 1.5 IQR of the upper quartile. Additional statistics generated on each layer/observation/feature combination include min/max/range, mean, standard deviation, and variance.
Below, use Numpy functions to calculate statistics on the quality-masked, land-only data. The format( , '4f') command will ensure that the statistics are rounded to four decimal places.
i = 0                                                                     # Set up iterator
for n in ndviTS:                                                          # Loop through each layer (day) in NDVI time series
    ndvi = n.data[~n.mask]                                                # Exclude poor quality and water (masked) pixels
    ndvi = ndvi[~np.isnan(ndvi)]                                          # Exclude nan pixel values
    n = len(ndvi)                                                         # Count of array
    min_val = float(format((np.min(ndvi)), '.4f'))                        # Minimum value in array
    max_val = float(format((np.max(ndvi)), '.4f'))                        # Maximum value in array
    range_val = (min_val, max_val)                                        # Range of values in array
    mean = float(format((np.mean(ndvi)), '.4f'))                          # Mean of values in array
    std = float(format((np.std(ndvi)), '.4f'))                            # Standard deviation of values in array
    var = float(format((np.var(ndvi)), '.4f'))                            # Variance of values in array
    median = float(format((np.median(ndvi)), '.4f'))                      # Median of values in array
    quartiles = np.percentile(ndvi, [25, 75])                             # 1st (25) & 3rd (75) quartiles of values in array
    upper_quartile = float(format((quartiles[1]), '.4f'))
    lower_quartile = float(format((quartiles[0]), '.4f'))
    iqr = quartiles[1] - quartiles[0]                                     # Interquartile range
    iqr_upper = upper_quartile + 1.5 * iqr                                # 1.5 IQR of the upper quartile
    iqr_lower = lower_quartile - 1.5 * iqr                                # 1.5 IQR of the lower quartile
    top = float(format(np.max(ndvi[ndvi <= iqr_upper]), '.4f'))           # Highest datum within 1.5 IQR of upper quartile
    bottom = float(format(np.min(ndvi[ndvi>=iqr_lower]),'.4f'))           # Lowest datum within 1.5 IQR of lower quartile
    d = {'File Name':(fileList[i]),'Dataset': 'NDVI','Date': date[i],
         'Count':n,'Minimum':min_val,'Maximum':max_val,'Range':range_val,
         'Mean':mean,'Median':median,'Upper Quartile':upper_quartile,
         'Lower Quartile':lower_quartile,'Upper 1.5 IQR':top,
         'Lower 1.5 IQR':bottom,'Standard Deviation':std, 'Variance':var}
    stats_df = stats_df.append(d, ignore_index=True)                      # Append the dictionary to the dataframe
    i = i + 1                                                             # Add one to iterator
# Remove variables that are no longer needed
del d, n, min_val, max_val, range_val, mean, std, var, median, quartiles, upper_quartile
del bottom,  axes, yeardoy, lower_quartile, iqr, iqr_upper, iqr_lower, top
Next, export the Pandas dataframe containing the statistics to a csv file.
stats_df.to_csv('{}{}-Statistics.csv'.format(outDir, outName), index = False) # Export statistics to CSV
Use the previously calculated statistics to plot a time series of Mean NDVI for the month of July 2018. Taking the figure one step further, plot the standard deviation as a confidence interval around the mean NDVI as a time series.
np.arange(0,len(ndviTS),1)
array([ 0,  1,  2,  3,  4,  5,  6,  7,  8,  9, 10, 11, 12, 13, 14, 15, 16,
   17, 18, 19, 20, 21, 22, 23, 24, 25, 26, 27, 28, 29])
fig = plt.figure(1, figsize=(15, 10))                                                           # Set the figure size
fig.set_facecolor("white")                                                                      # Set the background color
dates = np.arange(0,len(ndviTS),1)                                                              # Arrange all dates
ax = fig.add_subplot(111)                                                                       # Create a subplot
ax.plot(stats_df['Mean'], 'k', lw=2.5, color='black')                                           # Plot as a black line
ax.plot(stats_df['Mean'], 'bo', ms=10, color='lightgreen')                                      # Plot as a green circle

# Add and subtract the std dev from the mean to form the upper and lower intervals for the plot, then plot linear regression
ax.fill_between(dates,stats_df.Mean-stats_df['Standard Deviation'],stats_df.Mean+stats_df['Standard Deviation'],color='#254117')
ax.plot(np.unique(dates), np.poly1d(np.polyfit(dates, stats_df['Mean'], 1))(np.unique(dates)), lw=3.5, c='yellow');
ax.set_xticks((np.arange(0,len(fileList))))                                                     # Set the x ticks
ax.set_xticklabels(date, rotation=45,fontsize=12)                                               # Set the x tick labels
ax.set_yticks((np.arange(0.4,1.01, 0.1)))                                                       # Arrange the y ticks
ax.set_yticklabels(np.arange(0.4,1.01, 0.1),fontsize=12,fontweight='bold')                      # Set the Y tick labels
ax.set_xlabel('Date',fontsize=16,fontweight='bold')                                             # Set x-axis label
ax.set_ylabel("{}({})".format('NDVI', 'unitless'),fontsize=16,fontweight='bold')                # Set y-axis label
ax.set_title('VIIRS Surface Reflectance-derived NDVI: July 2018',fontsize=22,fontweight='bold') # Set title
fig.savefig('{}{}_{}_Mean_TS.png'.format(outDir, outName, 'NDVI'), bbox_inches='tight')         # Set up filename and export