This “recipe” was put together at the request of users who wanted to make quick and timely assessments of burned area. The method relies on visual interpretation and does not provide a robust or systematic means of determining burned areas. Please note this method does not work in all areas and will not work if the fire-affected area is not big enough or hot enough to burn and remove the vegetation or alter the vegetation structure. 

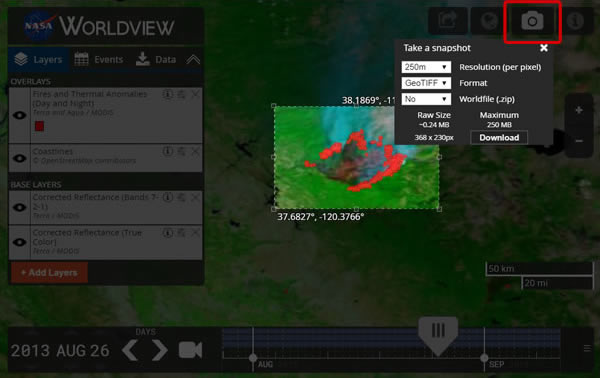
Worldview users can download a “snapshot” of the image in GeoTIFF, JPEG, PNG, or KMZ format.

The standard MODIS burned area products [MCD64A1] are not available in near real-time.
Find out more about the MODIS burned area products at: http://modis-fire.umd.edu/ba.html.
Image

Step 1 - Open Worldview

  • In your browser, open NASA Worldview
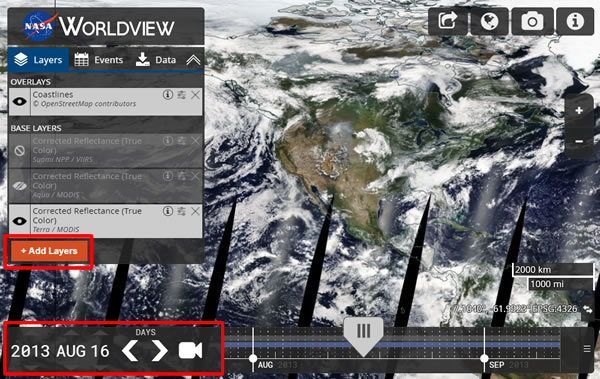
  • Set the date to August 16, 2013, on the time slider on the bottom
  • Click on '+ Add Layers'
Image

Step 2 - Set Layers

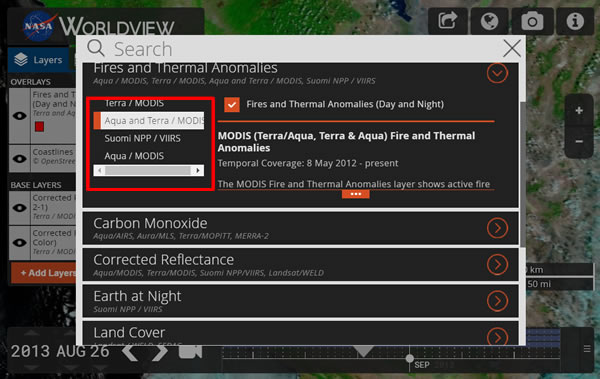
  • In the Main Menu, click on the Fires option
  • Expand Fires and Thermal Anomalies
  • On the left side, select Aqua and Terra / MODIS
  • Check the Fires and Thermal Anomalies (Day and Night) layer
Image
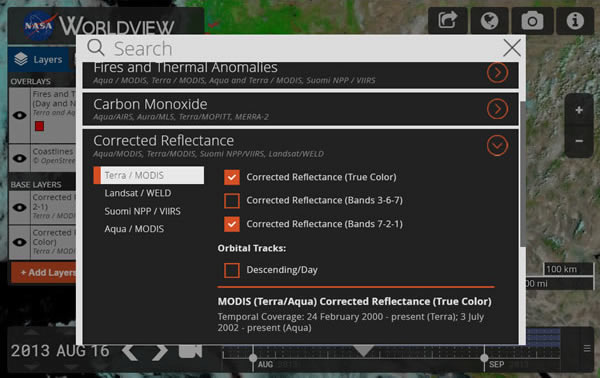
  • Expand Corrected Reflectance
  • On the left side, select Terra / MODIS
  • Check the Corrected Reflectance (Bands 7-2-1) layer
  • Keep the Corrected Reflectance (True Color) layer selected
Image

Step 3 - Zoom to California near Lake Tahoe

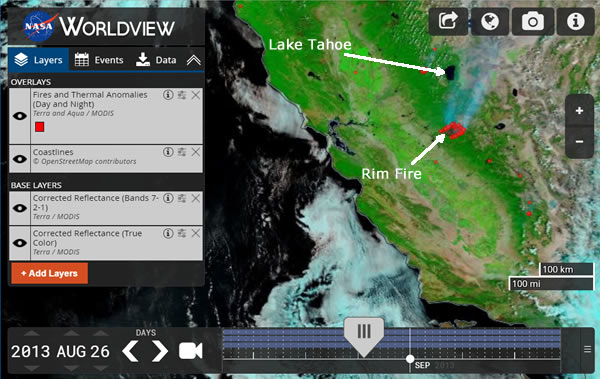
  • Navigate and zoom to the Lake Tahoe area of California
  • The approximate coordinates are 37°50’N and 120°00’W
Image
  • Zoom closer to the Rim Fire area
  • Change the date back to August 16, 2013, to see the image prior to the start of the fire
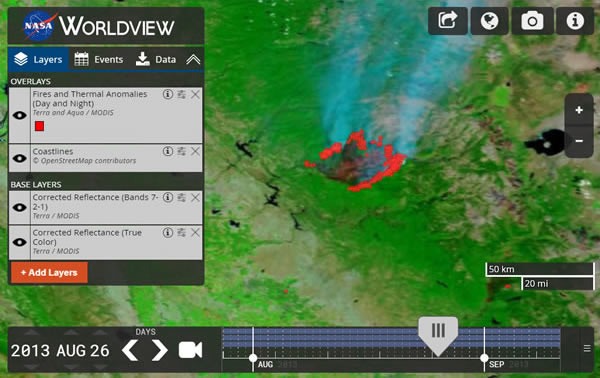
  • Use the Time slider to observe the fire progression from August 16 to 26
  • Alternatively, you open Worldview using this permalink 
  • Red points—MODIS hotspots (probably active fires)—and smoke are visible south of Lake Tahoe
  • The fire affected area appears reddish brown
Image

Step 4 - Download the GeoTIFF

  • Click on the camera icon to open the 'Take a snapshot' menu
  • Set the 'Resolution' to 250 m
  • Set 'Format' to GeoTIFF
  • Click on 'Download'
Image

Step 5 - Load the GeoTIFF into ArcGIS Pro

  • Launch ArcGIS Pro
  • Create New Map
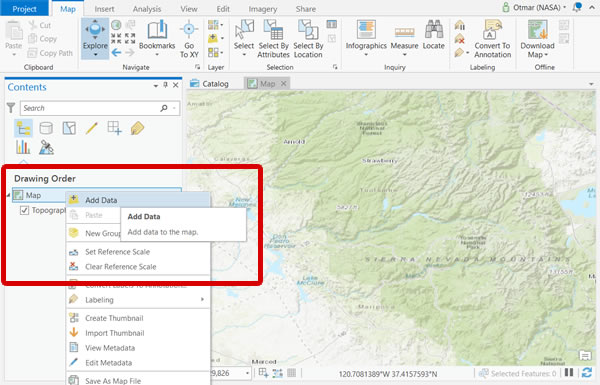
  • Right-click on 'Map' and select 'Add Data'
Image
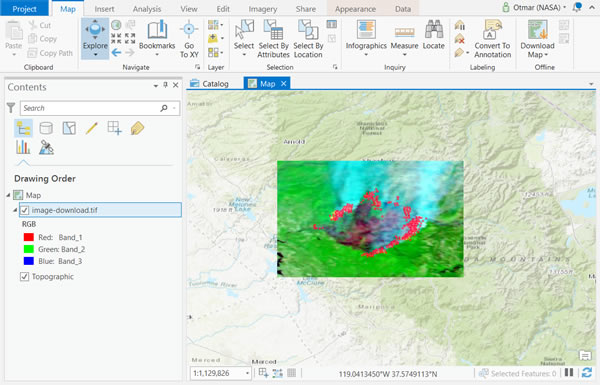
  • Locate and open your downloaded GeoTIFF from Worldview
  • The fire affected area is visible in reddish brown
Image

Details

Last Updated

July 2, 2026

Published

Aug. 26, 2013